
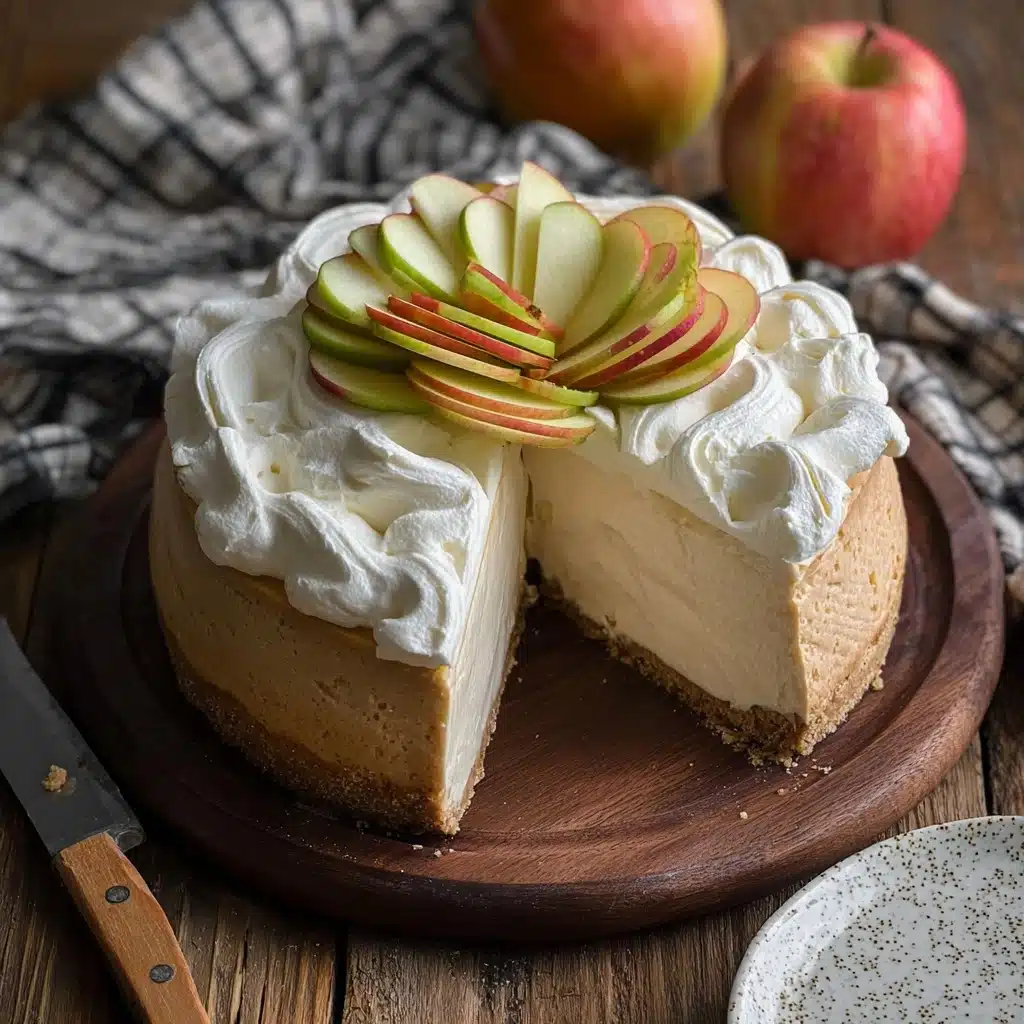
Apple Cider Cheesecake Recipe
Introduction
This Apple Cider Cheesecake is a delightful twist on a classic dessert, infused with the warm flavors of spiced apple cider. Its creamy texture and spiced aroma make it a perfect treat for cozy gatherings or special occasions in the fall and winter months.
Ingredients
- 270g (2 packed cups) digestive cookies or graham crackers
- 85g (6 tablespoons) butter, melted
- ¼ teaspoon salt
- 2 tablespoons powdered sugar
- 720g (3 cups) fresh apple cider (Honeycrisp cider recommended)
- Mulling spices
- 3 full fat cream cheese bricks (227g each), softened and at room temperature
- 200g (1 cup) brown sugar
- ½ teaspoon salt
- 2 teaspoons pure vanilla extract
- 240g (1 cup) sour cream
- ⅓ cup reduced apple cider (see method)
- 1 teaspoon cinnamon
- 3 large eggs
- 2 tablespoons all purpose flour
Instructions
- Step 1: Boil the apple cider with mulling spices in a large pot over high heat for about 1 hour, until it reduces to a thick syrup and you have about ⅓ cup remaining. Set aside to cool.
- Step 2: Preheat the oven to 350°F (175°C).
- Step 3: Make the crust by pulsing the digestive cookies or graham crackers in a food processor until finely ground. Add the melted butter, salt, and powdered sugar, then pulse again until the mixture forms wet crumbs.
- Step 4: Press the crumb mixture evenly into the bottom of an 8-inch round springform pan wrapped with foil or an 8×3 inch cake pan greased and lined with parchment paper. Bake for 10 minutes, then allow to cool and chill.
- Step 5: Lower the oven temperature to 325°F (160°C).
- Step 6: In a stand mixer fitted with a paddle attachment, beat the softened cream cheese and brown sugar until smooth and free of lumps, scraping down the sides as needed.
- Step 7: Add the sour cream, vanilla extract, salt, cinnamon, and the cooled reduced cider. Beat until the mixture is very creamy, scraping down as needed.
- Step 8: Add the eggs and flour, and beat just until combined. Do not overmix.
- Step 9: Place the cheesecake pan inside a larger 13×9-inch pan filled with hot water to create a water bath.
- Step 10: Pour the filling into the chilled crust and bake for 90 minutes or until the edges are set and the center is slightly wobbly when shaken.
- Step 11: Turn off the oven, crack open the oven door using a wooden spoon to keep it ajar, and let the cheesecake cool inside for 30 minutes.
- Step 12: Close the oven door and cool for another 15 minutes.
- Step 13: Remove the cheesecake from the oven and let it cool to room temperature on the counter. Once cool, refrigerate for at least 8 hours before serving.
Tips & Variations
- Use Honeycrisp apple cider for a more tart flavor that balances well with the sweetness of the cheesecake.
- Make sure the cream cheese is fully softened to avoid lumps in the filling.
- To enhance the spice flavor, add a pinch of nutmeg or cloves along with the cinnamon.
- If you don’t have a water bath, place a pan of hot water on the oven rack below the cheesecake to help regulate temperature and prevent cracking.
Storage
Store the cheesecake covered in the refrigerator for up to 4 days. For longer storage, you can freeze it wrapped tightly in plastic wrap and foil for up to 2 months. Thaw overnight in the refrigerator before serving. Reheat slightly to bring back softness if desired, but it is usually best served chilled.
How to Serve
Serve this delicious recipe with your favorite sides.
FAQs
Can I use regular apple cider instead of Honeycrisp?
Yes, regular apple cider works fine but Honeycrisp cider adds a nice tartness that complements the sweetness of the cheesecake wonderfully.
Why do I need to bake the cheesecake in a water bath?
The water bath helps to evenly distribute heat and maintain moisture around the cheesecake as it bakes, preventing cracks and ensuring a smooth, creamy texture.
Print
Apple Cider Cheesecake Recipe
- Total Time: 10 hours 5 minutes
- Yield: 8 servings 1x
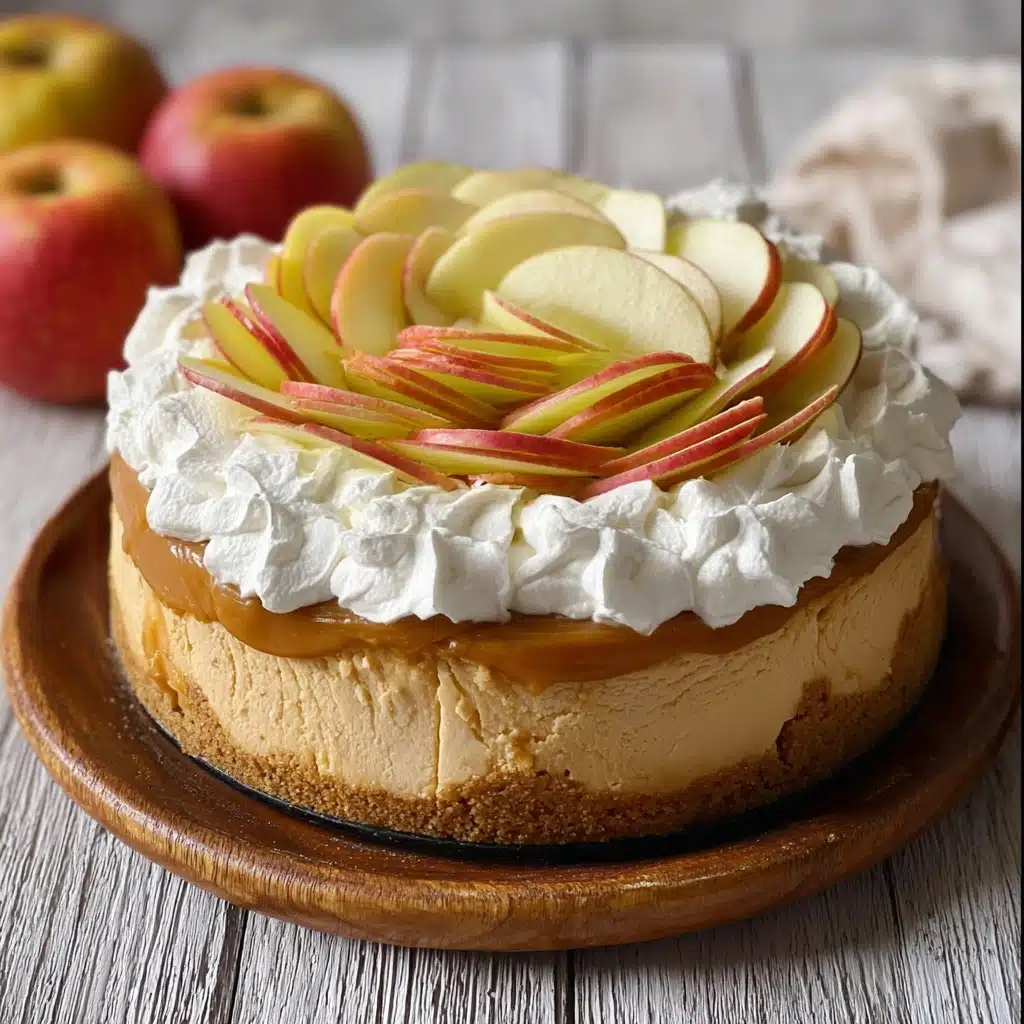
Description
This Apple Cider Cheesecake is a decadent dessert that combines the warm, comforting flavors of spiced apple cider with a creamy, smooth cheesecake filling on a buttery cookie crust. The cider is carefully reduced with mulling spices to create a rich syrup that infuses the cheesecake with a unique autumnal taste. Perfect for festive occasions or cozy gatherings, this cheesecake offers a delightful twist on a classic favorite.
Ingredients
Crust
- 270g (2 packed cups) digestive cookies or graham crackers
- 85g (6 tablespoons) butter, melted
- ¼ teaspoon salt
- 2 tablespoons powdered sugar
Filling
- 720g (3 cups) fresh apple cider (honeycrisp cider recommended for tartness)
- mulling spices (such as cinnamon sticks, cloves, allspice, and nutmeg)
- 3 full-fat cream cheese bricks (227g each), softened and at room temperature
- 200g (1 cup) brown sugar
- ½ teaspoon salt
- 2 teaspoons pure vanilla extract
- 240g (1 cup) sour cream
- ⅓ cup reduced apple cider syrup (from above)
- 1 teaspoon cinnamon
- 3 large eggs
- 2 tablespoons all-purpose flour
Instructions
- Reduce the Apple Cider: In a large pot, bring the 720g (3 cups) of fresh apple cider and mulling spices to a boil over high heat. Let it simmer and boil for about 1 hour until the liquid reduces to approximately ⅓ cup and forms a thick syrup. Remove from heat and set aside to cool completely.
- Preheat Oven and Prepare Crust: Preheat your oven to 350°F (175°C). In a food processor, pulse the digestive cookies or graham crackers until finely ground. Add the melted butter, salt, and powdered sugar and pulse again until the mixture forms wet crumbs.
- Form and Bake Crust: Press the crumb mixture firmly into the base of an 8-inch round springform pan wrapped with foil (to prevent water leaks) or a similarly sized cake pan greased and lined with parchment paper. Bake the crust for 10 minutes. Remove from oven and allow to cool, then chill in the refrigerator while you prepare the filling.
- Lower Oven Temperature: Reduce the oven temperature to 325°F (163°C) for baking the cheesecake.
- Make Cheesecake Filling: In a stand mixer fitted with the paddle attachment, beat the softened cream cheese and brown sugar until completely smooth and lump-free, scraping down sides as needed. Add the sour cream, vanilla extract, salt, cinnamon, and the cooled reduced cider syrup. Continue to mix and scrape until creamy and well combined.
- Add Eggs and Flour: Add the eggs one at a time along with the flour, beating just until combined. Avoid overmixing to prevent air pockets and cracking.
- Prepare Water Bath: Place your cheesecake pan inside a larger 13×9-inch baking pan. Fill the larger pan with hot water about halfway up the sides of the cheesecake pan to create a water bath, which ensures gentle, even baking.
- Bake the Cheesecake: Pour the filling into the prepared crust. Bake at 325°F (163°C) for about 90 minutes or until the edges are set and the center is slightly wobbly when gently shaken.
- Cool in Oven: Turn off the oven but leave the cheesecake inside. Prop the oven door open slightly using a wooden spoon to allow gradual cooling for 30 minutes, which helps prevent cracking.
- Further Cooling: After 30 minutes, close the oven door and let the cheesecake cool inside for another 15 minutes.
- Final Cooling and Chilling: Remove the cheesecake from the oven and allow it to cool to room temperature on the counter. Once cool, refrigerate the cheesecake for at least 8 hours or preferably overnight before serving to fully set and develop flavors.
Notes
- The mulling spices can be adjusted according to your preference; typical blends include cinnamon sticks, cloves, nutmeg, and allspice.
- Using a springform pan wrapped in foil is essential to prevent water from the water bath leaking into the crust during baking.
- Be sure not to overmix the cream cheese filling once the eggs and flour are added to keep the texture smooth and prevent cracking.
- You can prepare the reduced apple cider syrup a day ahead and keep it refrigerated to save time.
- Allow the cheesecake to chill thoroughly before serving for best texture and flavor.
- Prep Time: 25 minutes
- Cook Time: 1 hour 40 minutes
- Category: Dessert
- Method: Baking
- Cuisine: American
Keywords: Apple Cider Cheesecake, fall dessert, spiced cheesecake, creamy cheesecake, autumn dessert, holiday cheesecake


