
Homemade Red Velvet Brownie Bites Recipe
Introduction
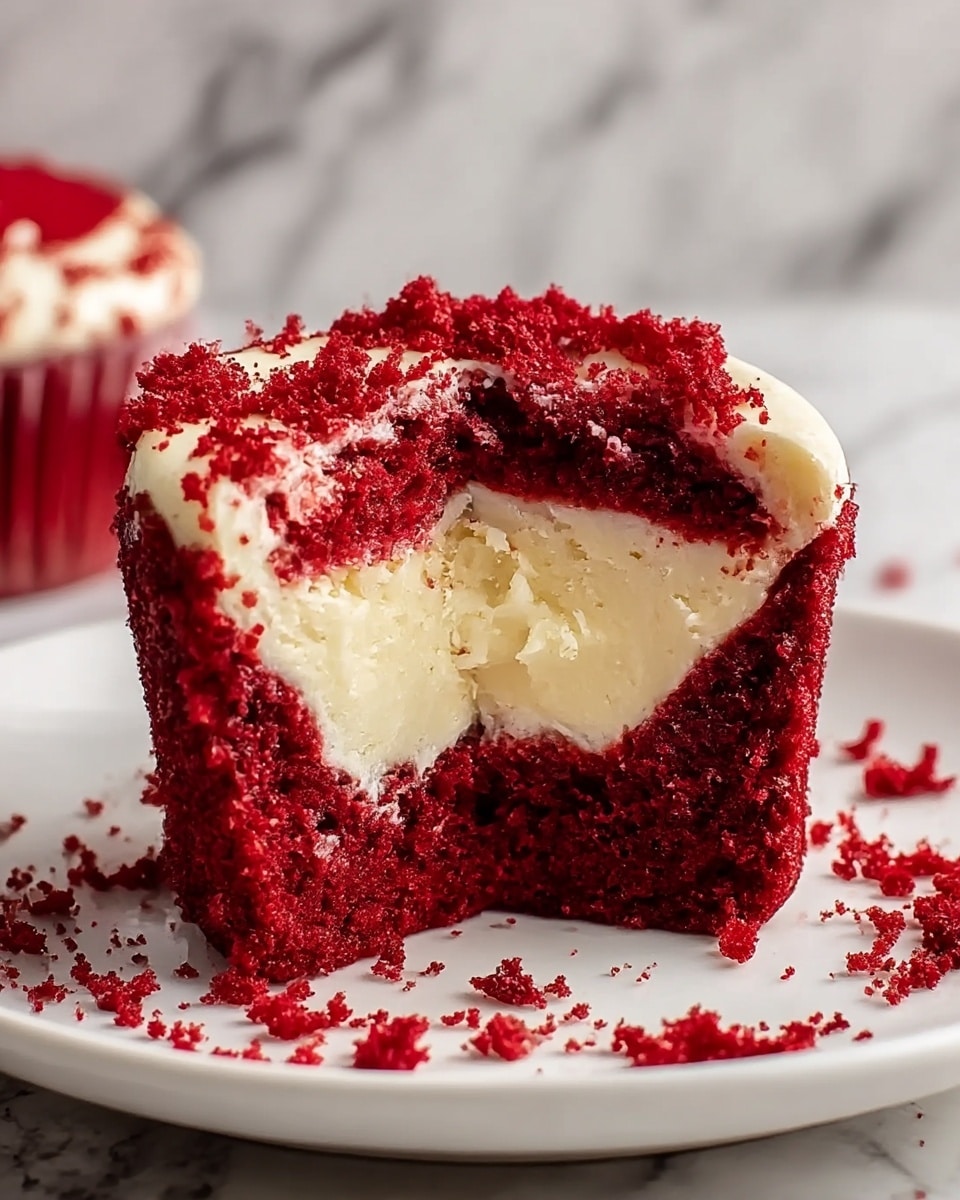
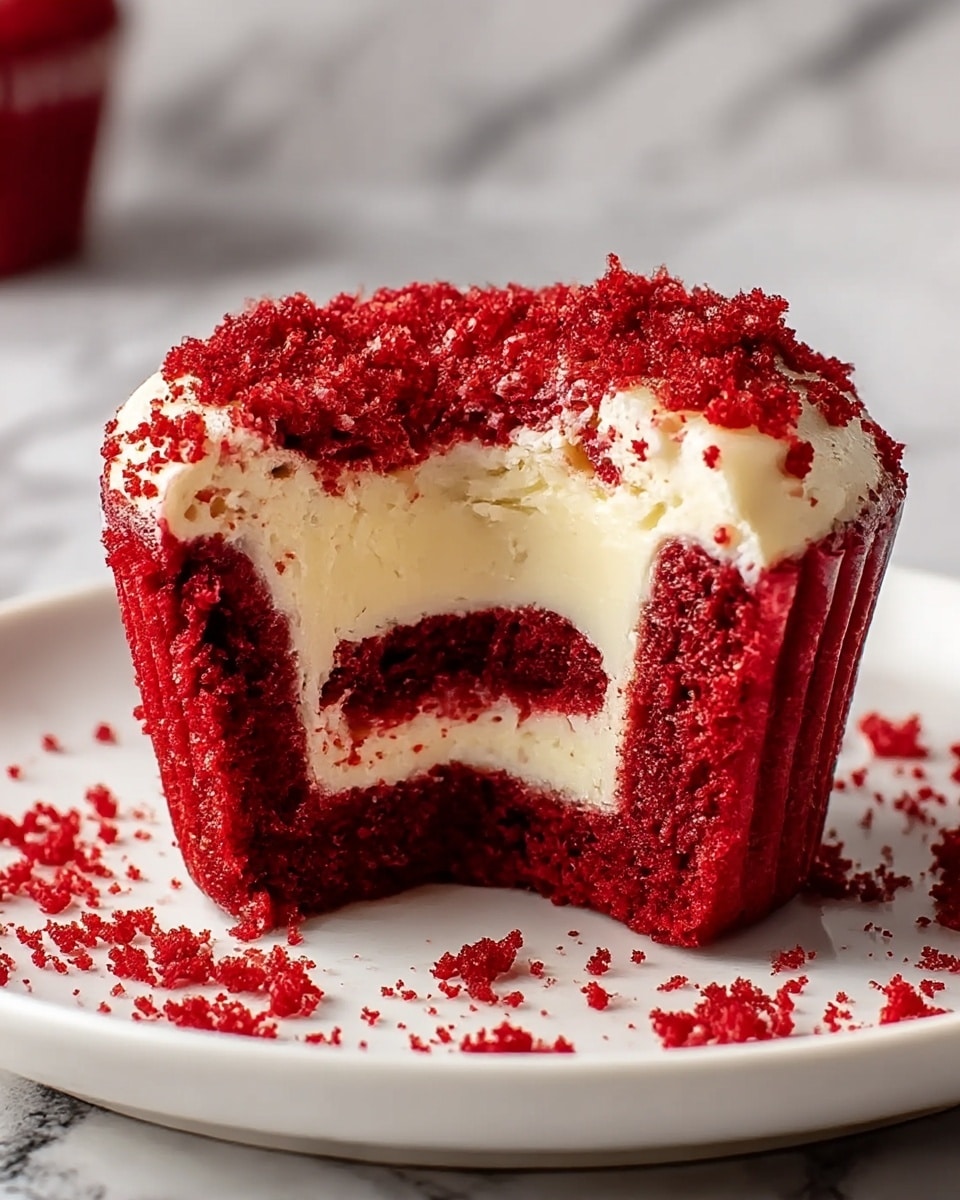
These homemade red velvet brownie bites combine rich, fudgy chocolate with a creamy cheesecake swirl for a delightful treat. Perfectly portioned in mini muffin form, they make a wonderful dessert or party snack. The tangy cream cheese filling adds a luscious contrast to the deep red velvet brownies.
Ingredients
- 9 tbsp unsalted butter (preferably Kerrygold), melted
- 1 1/4 cups sugar
- 1/4 cup cocoa powder, sifted
- 1/2 tsp vanilla extract
- 1 tbsp red food coloring
- 1/8 tsp salt
- 1/4 tsp espresso powder
- 1/2 tsp vinegar
- 2 eggs
- 3/4 cup all-purpose flour (King Arthur recommended)
- 9 oz cream cheese, room temperature (about 70°F)
- 3 tbsp sugar (for cheesecake filling)
- 1/2 tsp vanilla extract (for cheesecake filling)
- 1 egg yolk (for cheesecake filling)
Instructions
- Step 1: Preheat your oven to 350°F and generously grease a mini muffin pan with butter or cooking spray to coat the sides and bottoms of each cup. Sift the cocoa powder to remove any lumps and ensure a smooth batter. Bring all ingredients to room temperature, especially the cream cheese and eggs.
- Step 2: In a medium bowl, whisk the melted butter with sugar, sifted cocoa powder, vanilla, red food coloring, salt, espresso powder, and vinegar until combined. Add the eggs one at a time, fully incorporating each. Gently fold in the flour until there are no dry streaks, being careful not to overmix.
- Step 3: In a separate bowl, beat the cream cheese with sugar and vanilla until smooth and creamy, about 1 minute. Gently fold in the egg yolk until just combined, avoiding overbeating.
- Step 4: Spoon about 1 tablespoon of brownie batter into each mini muffin cup, filling halfway. Add roughly 1 teaspoon of cheesecake filling on top, then cover with another teaspoon of brownie batter to seal.
- Step 5: Use a toothpick or thin skewer to swirl the layers in a figure-eight or circular motion, creating a marbled effect without fully mixing.
- Step 6: Bake for 12 minutes. The tops should be just set and spring back lightly when touched while centers remain slightly soft. Let cool in the pan for 5 minutes before carefully removing with a thin knife or offset spatula. Allow to cool completely on a wire rack before serving.
Tips & Variations
- Use room temperature ingredients to achieve a smooth, well-blended batter and filling.
- Sifting cocoa powder helps prevent lumps and streaks in the batter.
- For a stronger red color, increase red food coloring slightly, but avoid overuse to maintain flavor balance.
- Experiment by adding a sprinkle of chopped nuts or white chocolate chips inside the batter for extra texture.
Storage
Store cooled brownie bites in an airtight container in the refrigerator for up to 4 days. To reheat, warm briefly in the microwave for 10–15 seconds to soften slightly. These bites can also be frozen for up to 2 months; thaw overnight in the fridge before serving.
How to Serve
Serve this delicious recipe with your favorite sides.
FAQs
Can I make these brownie bites without the cheesecake swirl?
Yes, you can skip the cheesecake filling for simple red velvet brownies. Just fill each muffin cup with the brownie batter alone and bake as directed.
What type of vinegar works best in red velvet recipes?
White vinegar or apple cider vinegar works well to enhance the red velvet flavor without adding noticeable acidity. Use the recommended amount to maintain the balance of tanginess.
Print
Homemade Red Velvet Brownie Bites Recipe
- Total Time: 27 minutes
- Yield: Approximately 24 mini brownie bites 1x
Description
These Homemade Red Velvet Brownie Bites combine the rich, fudgy texture of brownies with the creamy tang of a luscious cheesecake swirl. Perfectly portioned as mini treats, they feature the classic red velvet flavor enhanced by subtle espresso and vinegar, baked to tender perfection in a mini muffin pan. Ideal for parties, snacks, or anytime you crave a dreamy, elegant dessert bite.
Ingredients
For the brownie mixture:
- 9 tbsp unsalted butter (I recommend Kerrygold)
- 1 1/4 cups sugar
- 1/4 cup cocoa powder (sifted)
- 1/2 tsp vanilla extract
- 1 tbsp red food coloring
- 1/8 tsp salt
- 1/4 tsp espresso powder
- 1/2 tsp vinegar
- 2 large eggs
- 3/4 cup all-purpose flour (King Arthur recommended)
For the cheesecake swirl:
- 9 oz cream cheese (room temperature, about 70°F)
- 3 tbsp sugar
- 1/2 tsp vanilla extract
- 1 large egg yolk
Instructions
- Prep and preheat: Preheat your oven to 350°F (175°C). Generously grease a mini muffin pan with butter or cooking spray to prevent sticking and ensure easy removal of the brownie bites. Sift the cocoa powder to remove lumps for a smooth batter.
- Make the brownie batter: In a medium bowl, melt the butter. Whisk in sugar, sifted cocoa powder, vanilla extract, red food coloring, salt, espresso powder, and vinegar until combined. Whisk in the eggs one at a time, fully incorporating each before adding the next. Gently fold in the flour until just combined to avoid toughness.
- Prepare the cheesecake filling: In a separate bowl, beat the room-temperature cream cheese with sugar and vanilla extract until smooth and creamy, about one minute. Gently fold in the egg yolk until just combined, taking care not to overbeat.
- Assemble the brownie bites: Spoon about 1 tablespoon of brownie batter halfway into each mini muffin cup. Add about 1 teaspoon of cheesecake filling on top. Then add another 1 teaspoon of brownie batter to seal. Use a toothpick or skewer to gently swirl the layers in a figure-eight or circular motion, creating a marbled effect without fully mixing the batter.
- Bake: Bake in the preheated oven for 12 minutes, or until the tops are set and spring back lightly when touched but the centers remain soft and fudgy.
- Cool and remove: Let the brownie bites cool in the pan for 5 minutes to set. Use a thin knife or offset spatula to carefully remove them from the pan. Cool completely on a wire rack before serving.
Notes
- Ensure all ingredients, especially cream cheese and eggs, are at room temperature for best mixing and texture.
- Sifting cocoa powder removes lumps and prevents streaks in the brownie batter for a smooth finish.
- Do not overmix the batter to keep brownies tender and fudgy.
- Be gentle when swirling the cheesecake and brownie batter to keep distinct layers and an appealing marbled look.
- Use an espresso powder amount cautiously to enhance chocolate flavor without adding coffee taste.
- Cool completely before serving to allow brownie bites to set properly and avoid crumbling.
- Prep Time: 15 minutes
- Cook Time: 12 minutes
- Category: Dessert
- Method: Baking
- Cuisine: American
Keywords: red velvet brownie bites, mini brownies, cheesecake swirl brownies, red velvet dessert, chocolate cheesecake bites

