
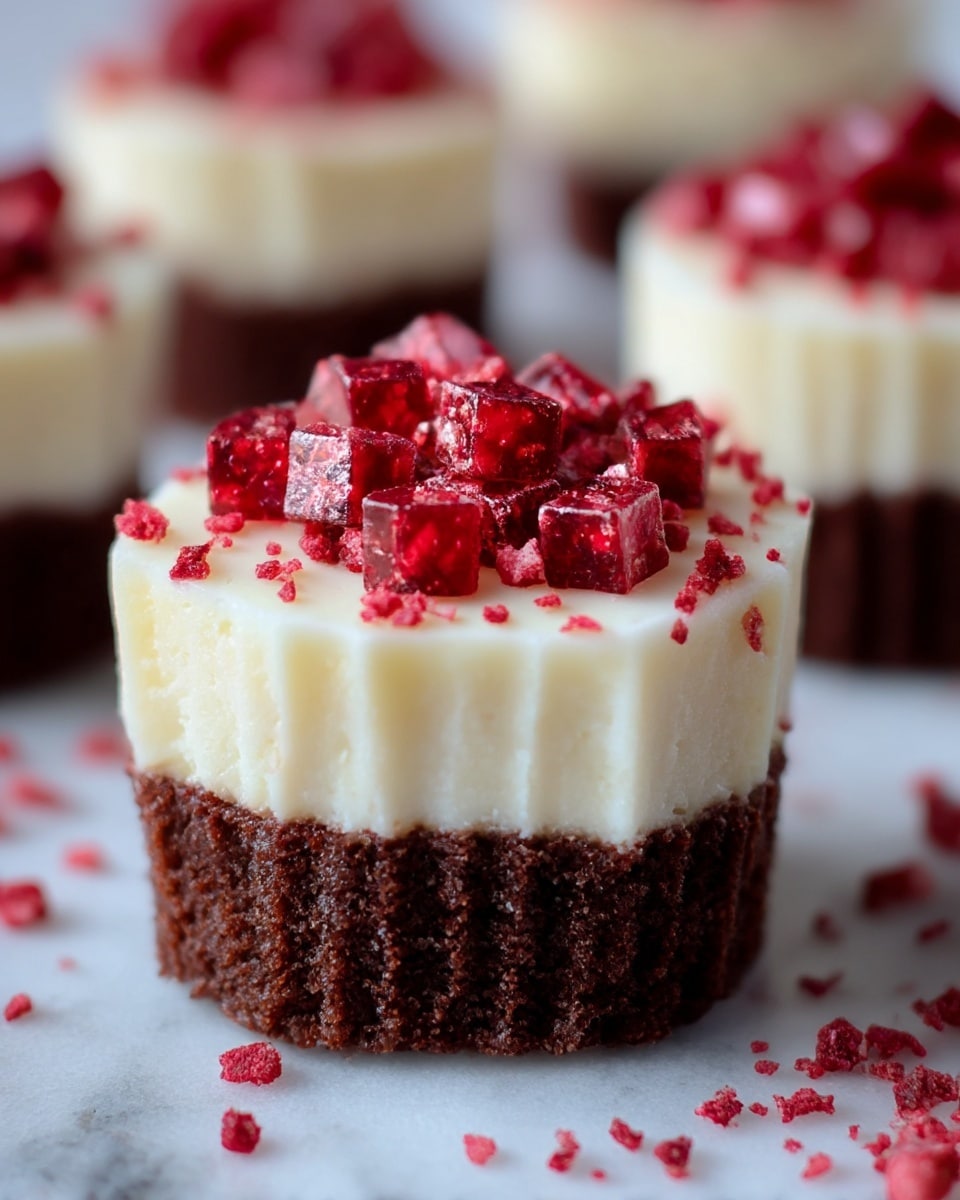
Red Velvet Cheesecake Brownies Recipe
Introduction
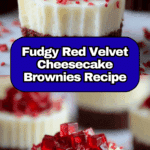
If you love the classic combination of red velvet and cheesecake, these Red Velvet Cheesecake Brownies are made just for you. They feature a fudgy red velvet brownie base with a creamy, swirled cheesecake topping. Perfectly decadent and beautifully marbled, they’re sure to impress any dessert lover.
Ingredients
- For the Red Velvet Brownie Layer:
- 1/2 cup (1 stick) unsalted butter, melted
- 1 cup granulated sugar
- 1/4 cup unsweetened cocoa powder
- 1 tablespoon red food coloring
- 1 teaspoon vanilla extract
- 1/2 teaspoon white vinegar
- 2 large eggs
- 3/4 cup all-purpose flour
- Pinch of salt
- For the Cheesecake Layer:
- 8 oz cream cheese, softened
- 1/3 cup granulated sugar
- 1 egg yolk
- 1/2 teaspoon vanilla extract
Instructions
- Step 1: Preheat your oven to 350°F (175°C). Line an 8×8 inch baking pan with parchment paper or grease it well.
- Step 2: In a medium bowl, whisk together melted butter, sugar, cocoa powder, red food coloring, vanilla extract, and white vinegar until combined. Add eggs one at a time, whisking until smooth. Stir in flour and salt just until mixed. Reserve 1/4 cup of batter for swirling, then spread the remaining batter evenly into the prepared pan.
- Step 3: In another bowl, beat together softened cream cheese, sugar, egg yolk, and vanilla extract until smooth and creamy.
- Step 4: Pour the cheesecake mixture over the brownie batter and spread evenly. Dollop the reserved brownie batter on top in small spoonfuls. Use a toothpick or knife to gently swirl the batter into the cheesecake layer, creating a marbled effect. Avoid over-swiping to keep the distinct swirls.
- Step 5: Bake for 30 to 35 minutes, until the edges are set and the center is just slightly jiggly. Let cool completely in the pan. For cleaner slices, chill the brownies in the fridge before cutting.
Tips & Variations
- Don’t skip the vinegar; it enhances the red color and adds the classic tang of red velvet.
- Use room temperature cream cheese to ensure a smooth and lump-free cheesecake layer.
- Try substituting beet powder for red food coloring for a natural alternative.
- Add white chocolate chips or chopped pecans into the brownie batter for extra texture.
- For a dairy-free version, use vegan butter and dairy-free cream cheese substitutes.
Storage
Store these brownies in an airtight container in the refrigerator for up to 5 days. For longer storage, wrap them tightly and freeze for up to 2 months; thaw overnight in the fridge before serving. Serve chilled or at room temperature—either way, they remain delicious and fudgy.
How to Serve

Serve this delicious recipe with your favorite sides.
FAQs
Can I double the recipe?
Yes, you can double the recipe and bake it in a 9×13 inch pan. You may need to increase the baking time by about 5 to 10 minutes. Keep an eye on the edges and center to ensure perfect doneness.
Do I need red food coloring?
Red food coloring is not essential, but it gives the brownies their classic vibrant red hue. You can use less dye or substitute it with natural alternatives like beet powder for color.
Print
Red Velvet Cheesecake Brownies Recipe
- Total Time: 50 minutes
- Yield: 16 brownies 1x
Description
Indulge in these Red Velvet Cheesecake Brownies—a delectable fusion of fudgy red velvet brownie base and creamy vanilla cheesecake layer swirled together for a stunning marbled effect. Perfectly rich, slightly tangy, and easy to make, these brownies satisfy both cheesecake and chocolate lovers alike.
Ingredients
Red Velvet Brownie Layer
- 1/2 cup (1 stick) unsalted butter, melted
- 1 cup granulated sugar
- 1/4 cup unsweetened cocoa powder
- 1 tablespoon red food coloring
- 1 teaspoon vanilla extract
- 1/2 teaspoon white vinegar
- 2 large eggs
- 3/4 cup all-purpose flour
- Pinch of salt
Cheesecake Layer
- 8 oz cream cheese, softened
- 1/3 cup granulated sugar
- 1 egg yolk
- 1/2 teaspoon vanilla extract
Instructions
- Preheat & Prep: Preheat your oven to 350°F (175°C). Line an 8×8 inch baking pan with parchment paper or grease it well to prevent sticking.
- Make the Brownie Batter: In a medium bowl, whisk together the melted butter, sugar, cocoa powder, red food coloring, vanilla extract, and white vinegar. Add the eggs one at a time, whisking until the mixture is smooth and well combined. Stir in the flour and salt gently until just combined. Reserve 1/4 cup of this batter for swirling, and spread the remaining batter evenly into the prepared pan.
- Make the Cheesecake Layer: In a separate bowl, beat the softened cream cheese with sugar, egg yolk, and vanilla extract until smooth and creamy, ensuring there are no lumps.
- Assemble & Swirl: Pour the cheesecake mixture evenly over the brownie batter in the pan. Then dollop the reserved brownie batter on top in small spoonfuls. Use a toothpick or knife to gently swirl the brownie batter into the cheesecake layer to create a beautiful marbled effect. Be careful not to over-swirl to preserve the distinct swirls.
- Bake: Bake in the preheated oven for 30 to 35 minutes, or until the edges are set and the center is slightly jiggly but not liquid. Remove from the oven and allow to cool completely in the pan. For cleaner cuts, chilling in the refrigerator before slicing is recommended.
Notes
- Do not skip the vinegar; it enhances the red color and adds the signature tanginess.
- Use room temperature cream cheese to avoid lumps in the cheesecake layer.
- Allow the brownies to cool completely before cutting to achieve neat, clean slices.
- Store in the refrigerator in an airtight container for up to 5 days or freeze wrapped for up to 2 months.
- Dairy-free alternatives can be used with vegan butter and plant-based cream cheese.
- Natural food coloring alternatives like beet powder can substitute red food coloring.
- For a richer brownie base, add 1–2 tablespoons of extra cocoa powder.
- Optional additions include white chocolate chips or chopped pecans for extra texture.
- Prep Time: 15 minutes
- Cook Time: 35 minutes
- Category: Dessert
- Method: Baking
- Cuisine: American
Keywords: Red Velvet Cheesecake Brownies, Fudgy Brownies, Cheesecake Brownies, Marbled Brownies, Dessert Recipe, Easy Brownies, Homemade Brownies